How to Make Custom Silicone Ear Molds
Custom Silicone Ear Molds
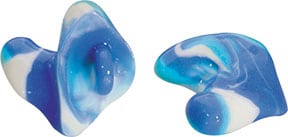
If you’re interested in learning how to make custom silicone ear molds, you’ve come to the right place. It is easy to create these custom-fit ear pieces and they are a great way to experiment with different designs. The first step in making a silicone earmold is to make an impression of the outer ring and earmold canal. After that, you’ll need to apply a foamy substance to the ring and ear canal. This foamy substance will dry in 5 minutes and will be a replica of the outer resemblance of the ear.
Once you’ve finished preparing the silicone mold, you’ll need to make the housing. The housing can be made from MDF or another nonporous material, such as a plastic container. The mold housing should be flat and non-porous. Lay the masters inside the mold housing, detailed side up. Next, apply a layer of release material and let it dry for 10 minutes. Once the release has dried, you’ll want to mix up the mold rubber. After the release agent has set, use a handheld electric sander to get rid of any remaining tackiness.
To begin making custom silicone molds ear molds, you’ll need to decide on a pattern for the ear. This will help you decide on what type of silicone earmold you need. Once you’ve decided on your pattern, the next step will be to create the mold itself. You’ll need to choose the type of mold that you need and what design you want to achieve. You’ll be able to use a 3D printer to create a mold quickly and easily.
How to Make Custom Silicone Ear Molds
The housing for the silicone mold should be non-porous and flat. You can use a premade plastic container or an MDF sheet to make one. The material that you choose should be non-porous and flat to help the silicone molds to stick. You’ll need to lay the masters on top of the mold housing, with the detailed side up. Then, apply silicone mold release and allow the molding to cure for about 10 minutes.
The first step in making custom earmolds is to make the mold housing. After you’ve finished, you can then pour the silicone into the mold. Once the silicone is set, you can remove the clay and masters. Once the mold is set, you’ll need to carefully clean the clay and masters. Then, you’ll need to remove the masters and the silicone to get the final product.
When you’re ready to start making custom silicone ear molds, you’ll need to have a template in place to guide you. Using an earmold template will help you create the correct ear-mold. For the earmolds that fit your ears, it’s important to measure correctly. This will help you make the perfect earmold. This template will also help you create a silicone earmold.